Image Map
Showing posts with label recipes. Show all posts

eat-up >> buttery apple crumb bake

This is my dish, y'all.

It's European. So fancy, I know (except it's not).

The real title is Swedish and I could never pronounce it. So in my immaturity as a high school student I started calling it "Apple Crap". Then my sometimes unorthodox family called it that too. They still do.

"Whatchya bringing?"

"Apple Crap."

"Oh good! I love Apple Crap!"

We're classy. I renamed it officially today. You're welcome.

And it's not so much an "apple crisp" like most Americans make dessert with their apples. Therefore I found it to be a unique treat that everyone loves. It's a crowd pleaser.

Did I mention it's easy? No? Well, it's easy.

Spray your pan with cooking spray (or butter it up). Peel your apples (I use Gala usually) and cut them up. I use one of these. They are life changing--and mine just broke. Whaaa. I like my apple pieces small. Bite size. And then sprinkle lovingly with cinnamon.
Crust time! I use to hate getting my hands messy but now I love it. Throw your butter, flour, and sugar in a large bowl and go to town mixing with your hands. Break up the butter and incorporate the flour and sugar well. It should form big crumbs. You don't want huge globs of butter because when you bake it it will just melt and lay flat. Some tricks I have learned over time: 1. make sure your butter is room temp--It's so much easier to get the right texture and size of crumbs. 2. Flour is key. Sometimes I will add more. The crust will stick to your fingers but it shouldn't be gooey sticky. If that's where you're at then add more flour a little at a time until the butter gets more separated.

Cover the apples with the crust and bake.

Easy and sooooo good. It's even more amazing with ice cream. But it's probably the best the next morning for breakfast....

FYI: Father's love this dessert. Just thought I would mention that with Father's Day around the corner ;)


.............................................................

Buttery Apple Crumb Bake


3 apples, peeled and chopped
Cinnamon
2 cups flour
1 1/2 cups sugar
1 1/2 cups butter, room temperature

1>> Preheat oven at 350 degrees. Grease a 9x13 inch glass dish.
Add apples evenly. Sprinkle generously with cinnamon.

2>> In a large bowl, add butter, flour, and sugar. Mix with your hands 
until all components are integrated, the butter begins to piece a part 
and generous size crumbs form. Be sure that mixture is not too 
sticky-gooey--add more flour if needed.

3>> Cover apples with butter mixture. Bake for 30-45 minutes until 
golden brown.


Follow on Bloglovin

pin-win >> buttermilk blueberry breakfast cake

recipe & photo via Alexandra's Kitchen

I have a lot of pins on Pinterest.

And I rarely ever reference them. And I hate that.

So here is my conclusion: I will make at least one Pinterest recipe/craft a week and report the keepers on the blog so you don't have to waste your time slaving away on something that is going to turn out bleh (we've all been there).

So here is my first Pinner Winner! 

.................................................

We are blueberry muffin fans around here. And I am a sucker for breakfast breads. What intrigued me about this recipe was A. buttermilk  and  B. she said it isn't too sweet. When I eat super sweet breakfasts I pay for it later in the form of feeling icky (still worth that donut though).

I made this and it was a hit. I actually cooked mine up in a bread loaf pan (she recommends a 9 inch square baking dish) and it looks gorgeous! I think it could make an incredible homemade gift in loaf-pan form--my only concern would be slicing it. It's more crumbly than typical bread. Or maybe it came out that way because we couldn't let it cool off before eating it all...

We loved it. Just sweet enough but not too sugary. No stomach aches here!

Make it. Visit this link >> Alexandra's Kitchen >> for her recipe.
Follow on Bloglovin

eat up >> grandma's caramel apple salad


I can barely call this dish a "fruit" salad. Although it does contain fruit and some other typical fruit salad standard ingredients, it also contains a lot of Snickers candy bars--which makes this salad literally taste like you took a bite out of a caramel and chocolate covered apple. The perfect way to sneak dessert on to your plate without feeling like you broke a rule.


I definitely recommend putting some crushed snickers on top as a garnish and maybe even some caramel sauce. Otherwise people will pass up the "fruit salad" because it will look questionable (their are some mystery fruit salads out their...). And then they will regret it once one person tastes it. Adding a garnish tells people what's hiding inside--and then they will make sure and grab some.

If you want people to love you, bring this "fruit salad".

It's a party in your mouth. 

So go ahead and whip this up and party on. 

You're welcome.

...................................................

Caramel Apple Salad

Serves 4-6

4 Snickers candy bars, frozen
4 Granny Smith apples, chopped
1  8 oz tub of Kool Whip
1  3.4 oz pkg Instant Vanilla Pudding, dry
Caramel Sauce (optional for garnish)

1 >> Add apples, Kool Whip, and dry pkg of pudding into a medium bowl.
2 >> Put your frozen candy bars in a large ziplock and go to town on them 
with a meat mallet (or anything that will smash them into little pieces).
Add broken Snickers to the bowl.
3 >> Mix all ingredients. Garnish with broken Snickers bars and caramel 
sauce (optional).


Follow on Bloglovin

eat up >> southern cinnamon banana pudding

I've got the hook-ups to some down south cooking and I am oh so grateful that I do.

My mom was born and raised in Louisiana. Mom met my Pacific Northwestern father and somehow they ended up in Arizona. My mom's family followed her out here and brought with them their Southern dishes.
This recipe is just one of the crowd-pleasers. And I added some cinnamon--because how can you go wrong with a little cinnamon? You can't.

If you are in a pinch--go ahead and throw some Kool Whip in their instead of whipping your own cream. I won't tell a soul.

I love banana. I love pudding. I love cookies. Therefore, I also love Southern Banana Pudding. The end.

...........................................


Southern Cinnamon Banana Pudding

www.glad-heart.blogspot.com

1 box of 'Nilla Wafers cookies
3-4 bananas, sliced into rounds
4 c. whole milk (or other milk...but whole is yummier)
1  3.4 oz pkg of Instant Vanilla Pudding
1  3.4 oz pkg of Instant Banana Pudding
1  8 oz pkg cream cheese, room temp.
1  14 oz cab sweetened condensed milk
5  dashes of cinnamon
1  pt heavy cream, whipped (or Kool Whip if your in a bind)

1 >> Whisk together Instant puddings and milk in large bowl for 2 minutes. 
Set aside.
2 >> In separate bowl, stir together cream cheese, cinnamon, and 
condensed milk. Add cream cheese mixture and whipped cream to pudding
mixture. Fold.
3 >> In a trifle bowl (or individual serving dishes), layer Nilla Wafers, 
bananas, and 1/3 of pudding mixture. Repeat two more times (making three
layers) ending with pudding on top.
4 >> Chill until time to serve.

...........................................


Follow on Bloglovin

eat up >> black eye pea tacos

 photo IMG_6507.jpg
Oooooh, these tacos. I have used this recipe for close to ten years now and it's still a favorite of mine.

I love me some meat generally, but sometimes a veggie meal is so refreshing. This recipe is light, healthy, and unique.

It's called "Black Eye Pea Tacos" but in reality it would be nothing special without the corn. It makes the dish. The onions add a lot too. And the garlic....and the green chilies. Don't be afraid to be generous with the S&P.

Feel free to make this filling and use it in enchiladas, burritos, or as a nacho base too. It has been done and it is wonderful.

The garnishes are my fave though. I personally top mine with lime cabbage slaw (cabbage slaw with lime juice and a touch of salt and pepper--I witnessed my sister-in-law do this one day and I am oh so happy I did), crumbled feta cheese, and a healthy dose of El Pato (this link lists El Pato for sale for $3.95. If you have it in your grocery store it's usually less than a buck). Sometimes an avocado makes it in the taco as well.

I use corn tortillas because I like the texture and flavor. Although I would appreciate any pointers on how to keep the tortilla from splitting in half in the middle of taco-happiness. If (more like when) this happens, I just pretend it's an enchilada, smother it with sauce and get my trusty fork out. Still delicious.

 photo IMG_6505.jpg
..........................................................


Black Eye Pea Tacos

Serves 4-6

1 medium onion, finely chopped
4 cloves of garlic, minced
2 Tbsp. diced green chilies (canned)
2 cans black eye peas (drained and rinsed)
10 oz frozen corn
2 c. water
1/2 c. chopped cilantro (optional--I add it fresh to my own taco)
6 inch corn tortillas

1 >> Throw some oil in a medium skillet over medium heat. Add onions. Cook until translucent and soft. Add garlic and green chilies. Season well with salt and pepper. Stir for a minute.

2 >> Add black eye peas, corn, and water to the skillet. Bring to a boil, reduce to a simmer. Simmer until most liquid has evaporated. Stir in cilantro. Season with salt and pepper. Remove from heat.

3 >> Fill your tortillas and garnish as you wish.

Suggestions for garnish >> cabbage (with lime juice and salt), fresh cilantro, crumbled feta cheese, El Pato sauce (or another hot sauce/salsa you like), avocado, sour cream

**this can also be put into enchiladas, burritos, or as a nacho base.


..........................................................
Image Map

Follow on Bloglovin

eat up >> mas salsa


 photo IMG_6479.jpg
I love salsa. Probably too much.

I could eat a whole jar in one sitting all by my lonesome.

I was searching for a good recipe when I visited a friend's house and she whipped some out of the fridge that her Mexican neighbor made. She was so kind and called for the recipe.

Of course the recipe was relayed a little like this: "yeah--a few chilies ..add some garlic...some cans of diced tomatoes..." Those Mexican ladies make such good salsa and so often that they can just eyeball it and throw it together. And it always turns out amazing. But us white girls need some specific direction.

Okay, I am exaggerating a little. But I did have to do a lot calculating on my own.
 photo IMG_6486.jpg
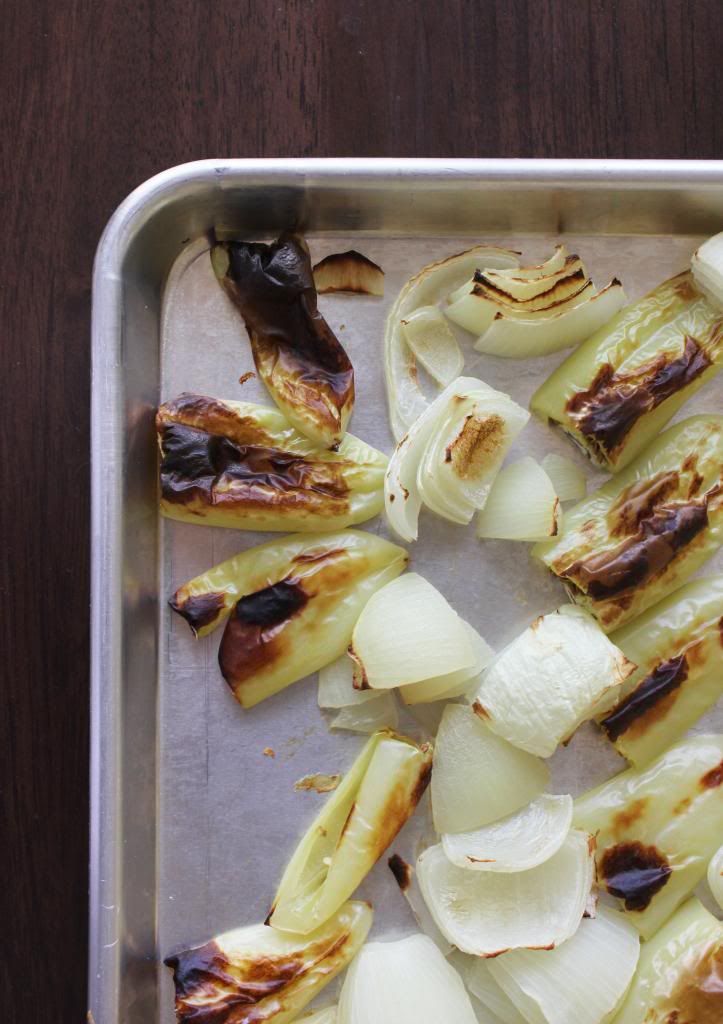
This salsa is a mild-to-medium heat. It's got a fantastic flavor to it--definitely not going to taste like chopped tomatoes when you are done. And it does call for roasted chilies  If you have a Little Mexico near by (like I do) you can purchase them roasted (and they are amazing). Or you can roast them in the good ol' oven as seen here.
 photo IMG_6229.jpg

One more ingredient we should discuss is the "menudo mix". You can find it in the grocery store on the Mexican food aisle. There should be a section with little clear plastic baggies of seasonings and such. Find the baggie that says "menudo mix". That's the stuff.

Now go make some salsa!

...............................................................
Mas Salsa

Makes about one large bowl (about 112 oz)

2 onions (roasted, roughly chopped)
6 yellow chilies (roasted, roughly chopped...you can also use green chilies)
4-6 garlic cloves (depending on your love for garlic)
1 lime
7 Tbsp. jarred jalapenos with brine (I used mild)
6 14.5 oz cans diced tomatoes with juice
1/2 bunch cilantro 
2 tsp. menudo mix (find on the mexican aisle in a clear plastic baggy)
1 tsp salt

1 >> Throw your roasted onions, roasted chilis, garlic, jalapenos with brine, cilantro, and juice of one lime into a food processor. Pulse until it looks like a pesto. Poor into large bowl.

2 >> Poor a few jars of tomatoes with juice into the food processor. Pulse to the consistency you like in a salsa. Poor into the large bowl as well. Repeat until you get through all the jars of tomatoes.

3 >> Add salt and menudo mix to the bowl. Stir until well mixed. 

4 >> Divide into containers and store in fridge or freezer. Flavors will marry over time (which means this salsa will taste even better tomorrow!).

...............................................................


Image Map
Follow on Bloglovin

eat up >> bed & breakfast baked oatmeal

 photo IMG_6303edit.jpg
Baked Oatmeal is a family favorite around our house. My kids love it, I love it, and my husband reeeeaaaally loves it. It's a sweetened oatmeal--but it's not loaded with sugar. That's what I like about it--not too sweet but sweeter and tastier than regular oatmeal (you can always add more sugar or maple syrup after the baking is done if you are looking for a sweet-tooth satisfying breakfast).

This recipe comes from a friend who stayed at a Bed & Breakfast, fell in love with the baked oatmeal she ordered, and then asked for the recipe. So glad she asked and decided to share!

What makes this recipe special is that it gets a crispy crust on top. That's my favorite part. And the inside is a mix between oatmeal and cake. I know, right?!

The recipe calls for individual bowls or remikins (about 6) but I have baked this goodness in a small casserole dish before. If you choose that route just do the tooth pick trick to ensure it's baked through in the center.

 photo IMG_6302.jpg

Did I mention this is quick and easy? No? Well it is.

You're welcome.
...................................................................................................................................................................
Bed & Breakfast Baked Oatmeal

Makes 6 individual bowls or one small baking dish


3 c. old fashioned cooking oats
2 tsp. baking powder
1/2 tsp. salt
1 c. brown sugar
1 tsp. cinnamon
1 c. milk
1/2 c. melted butter
2 eggs, lightly beaten

1 >> Preheat oven to 350 degrees. In large bowl, mix all ingredients together. 

2 >> Spoon the batter into 6 individual greased baking bowls or small greased baking dish.

3 >> Bake for 30-35 minutes until toothpick insterted in center comes out clean and top is golden brown and crispy (mmmmmmm....). 
Serve warm with milk drizzled on top
...................................................................................................................................................................
Image Map
Follow on Bloglovin

eat up >> cajun crawfish boil for papa sug

 photo IMG_6371.jpg
My Cajun Grandpa (Papa Sug) passed away this last October and his birthday was on Saturday. He was born and raised in Louisiana and he also raised his own children there. Somehow we migrated to Arizona but  Papa Sug kept his accent intact, along with his favorite southern food. Our family decided that a good 'ol southern crawfish boil was the best way to celebrate our Papa.

As a kid I remember going to crawfish boils and I can honestly say that we haven't had one in probably 20 years? We ship the crawfish straight out of Louisiana so the cost can add up, which makes this event quite special.

They are shipped, still alive, from a farm in Louisiana (although if you live there you can catch them yourself).
 photo IMG_6316.jpg

And those pincers work. Just ask my Uncle.
 photo crawfish-raw.jpg
Before we cook the crawfish we throw some corn, smoked sausage, mushrooms, red potatoes, and lemon in a giant pot full of water and Cajun seasonings. Let them soak for a while.
 photo IMG_6328.jpg

 photo IMG_6330.jpg

Strain out the veggies and sausage but keep that giant pot of seasoned water around for the crawfish to take a bath in later. Throw the veggies and sausage on the table. And yes, that's newspaper instead of a table cloth. It's the Cajun way. Plus clean-up is much easier. Might I add that the last time we had this kind of shindig I remember Papa Sug having all the veggies in a mesh bag while they were soaking--smart man.
 photo veggies.jpg

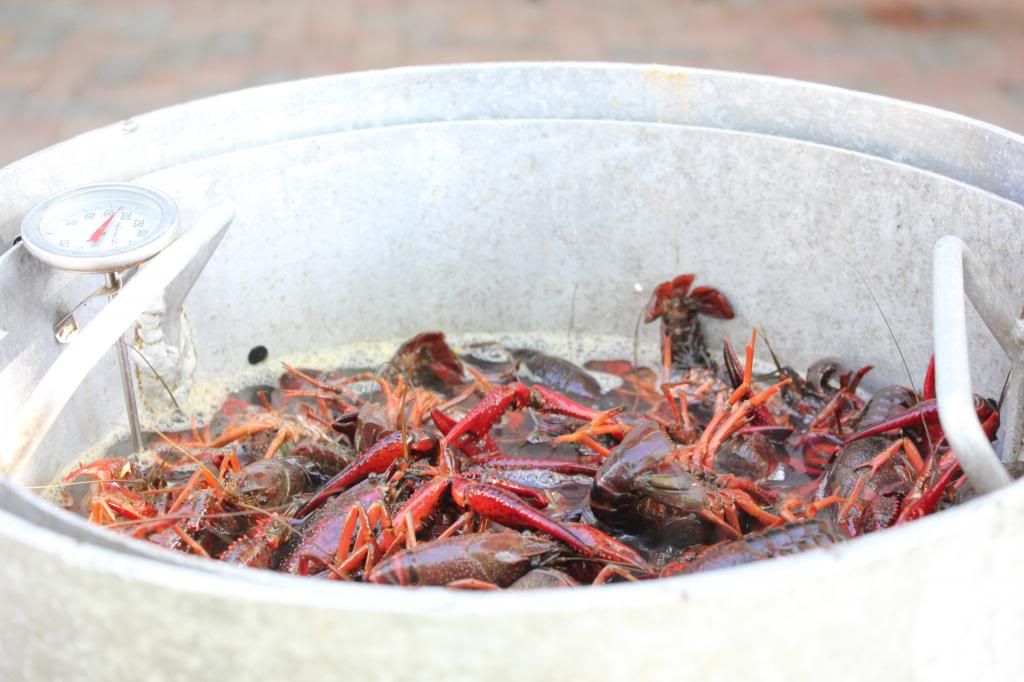
Then the live crawfish take a dip in the hot tub. They were way excited about this part. Everyone loves hot tubs.
 photo totheboiler.jpg

 photo IMG_6348.jpg

After the hot tub comes the cool down in the seasoned water. These cooked bad boys will soak up all that flavor for a little bit.


 photo IMG_6356.jpg

Then the feast begins!
 photo atthetable.jpg

 photo IMG_6378.jpg
Now, their is a technique and a procedure to how you eat these guys.

1. Firmly grip the back with your left hand and the tail with your right.
2. Hold tight and twist the tail, then pull the tail off.
3. Peel the first "ring" of the shell off the tail.
4. Now grab the meat with your left, grab the very base (fin) with your right, gently pull. The meat should come out smoothly.
5. De-gunk.
6. Dip in either melted butter (my fave), mayo-ketchup-hot-sauce dip, or vinegar with salt and pepper.
7. Enjoy!


You may have heard a rumor that true Cajuns will eat all the insides of the chest cavity/head ( aka sucking the head). This is true. Apparently the flavor is amazing.

Calm down now. We are Cajuns who adapted to city life...so we mainly eat the tails. Every now and then someone will get brave and go for it. But I will never be persuaded. Ever. Giant gag-reflex problem here.

But my dad got in on the action. And so did my Uncle. Good for them.
 photo IMG_6389.jpg

It was a fun evening and I loved bringing a touch of my Papa Sug's homeland to the desert.


Follow on Bloglovin

eat up >> sausage & spinach bread pudding


 photo breaddpudding3.jpg

Oooooh, bread pudding. I pretty much love it in all forms. A sweet version is automatically what you think of and are familiar with. But let me tell you--savory is just as amazing.

We had an Easter Brunch this year instead of the traditional dinner. I immediately knew that this dish would be my contribution. I had made this for dinner a few times with my little family and always thought to myself what a great brunch meal this would make.

And it did.

 photo breadpudding1.jpg

This particular recipe calls for ground sausage, spinach, onions, and garlic...but please don't let that stop you. The possibilities are virtually endless. I have seen savory bread puddings with cherry tomatoes and mushrooms or ham, broccoli and cheddar... anything you've got in your fridge. That's why they are so fantastic. Stale bread, produce on it's last leg, left over meat from last nights meal...add the base for the pudding with some bread and you've got dinner! Easy-peasy.

.........................................................................................................

Sausage & Spinach Bread Pudding

Makes 9x13 inch baking dish

1 lb. ground sausage
1/2 onion, finely chopped
2 garlic cloves, minced
1 bunch of spinach
7 lg eggs, lightly beaten
1 loaf french bread or baguette (stale bread is fine) cut into cubes
2 1/2 c. milk (not skim)
1 c. shredded white cheese of your choice


1 >> Heat large skillet over medium-high heat. Brown sausage. 
Transfer sausage to bowl, reserving fat in the pan. Cook onion until 
translucent. Add spinach. Cook until wilted. Add garlic. Season with 
salt and pepper.

2 >> Spread half of the sausage and half of the spinach mix in the 
bottom of a 9x13" baking dish. Top with bread. Top bread with remaining
sausage and then spinach mix.

3 >> In a large bowl, whisk together milk and eggs. Season with salt 
and pepper. Pour into baking dish evenly. Cover and let sit for at least 
10 minutes or covered over night in the fridge (yay!).

4 >> Bake at 375 degrees, covered with foil, for 45 minutes. Add cheese
to the top and bake uncovered for an additional 6-10 minutes until cheese 
is melted, eggs mixture is mostly absorbed and set in the center.

.............................................................................................................


Enjoy!!


Image Map

Image Map
Follow on Bloglovin